Thankful for Sausage Stuffed Mushrooms… and you!

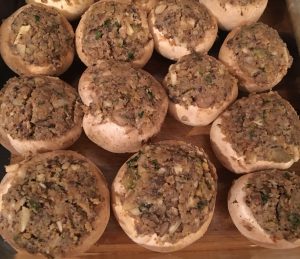
It wouldn’t be Thanksgiving without Sausage Stuffed Mushrooms.  I bring these mushrooms to my mother’s Thanksgiving table every year, and now you can bring them to your table, too!  These are a rich, delicious, flavorful Thanksgiving side dish or heavy appetizer… or, whip these bad boys up on any old Thursday night and pair with Butternut Squash Soup, crusty bread and a Scrubber Salad, and you’ve got yourself a hearty, seasonal, well-balanced meal!  (And oh my god, will your kitchen smell good.)

Happy Thanksgiving, my wonderful friends.  I am so thankful for all of you– for your comments, thoughts, ideas and support.  You have made my blogging experience totally worthwhile and fulfilling.  Have a delicious week!


Fall Favorites

I feel like this doesn’t even need to be said, but, of course, Fall is by far my favorite season.  First of all, school is back in session, which creates the framework for a sweet, merciful routine that is the magic charm of meal-planning.  Although busy as heck, I still say “ahhhhhh” to regular, predictable (even if jam-packed and hectic) schedules.  There is a chill in the air, so it feels ok to turn on the oven and the stovetop for soups, stews, sauces and chilis that need to simmer.  The horse chestnuts fall to the ground, the ducks return to the pond, the landscape is at its most brilliant, and nearly every run is rewarded by a spectacular sunrise.  And to top it all off, the year’s most nutrient-rich, healthiest foods are being harvested by the bushel.  What’s not to love!?  In tribute to our beloved Harvest season, here are a few of my favorite Fall things:

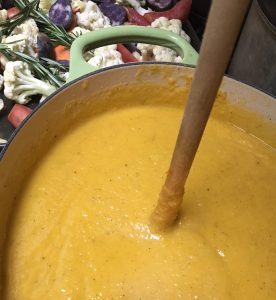
Butternut Squash Soup and Soft Molasses Ginger Cookies

Today, I’m going to re-share the Soft Molasses Ginger Cookie recipe, and serve up the Butternut Squash Soup recipe so that you can enjoy these Fall flavors, too!  Happy Fall Cooking, Baking and Eating!


Apple Crisp


We love apple picking.  We love it so much that we get totally carried away each year when we go…

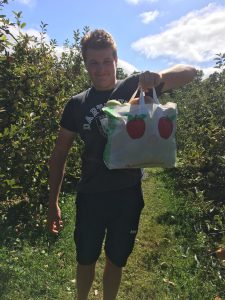
When I tell you that we picked 90 pounds of apples a few weeks ago, I mean that we probably picked about 125 pounds of apples.  We filled three, 30 pound bags, to the brim, and ended up with a few extra little bags on the side (drops and overflow).


Are you like this?  Does your whole family enjoy plucking ripe, delicious fruit from the trees so much that you end up awash in apples at the end of your excursion?  If so, Apple Crisp is one of the best ways to manage your apple overload.  When I say “best,” I mean, it’ super easy, you can use ingredients already in your pantry, it’s as delicious a treat as apple pie, and you can make it again and again without tiring of the taste or the task.  This Crisp has a more complex spice palate than others I’ve seen… by the time it’s apple-picking season, I’m dying for these Fall spice flavors and can’t wait to bake them into something wonderful.

And if you still have piles and piles of apples, don’t forget to make our all-time favorite stand-by, Crock Pot Apple Sauce!  So far, we have made two batches of apple sauce, five beautiful pies, and two batches of Apple Crisp with our haul.  And there are about 35 apples left in the fruit bowl.  So, yeah– we’re running low.  Enjoy!!


Tomato Day: How to Can Your Own Tomatoes


This post is dedicated to the lady on the left, my mother… She’s the one who makes the magic happen.  I love her smile in this picture, and she loves the look on her brother’s face and seeing her mother’s smile (my Grandma Lanzafame)!  Thanks for another awesome Tomato Day, Mom.  We love you!

So, in my house, you can’t make sauce without tomatoes… and we like to can them ourselves.  This is why I’m always talking about how many quarts of tomatoes you need to make this or that… because that’s how they “come” around here: in quarts, that were canned with love by the amazing women in our family and extended friend-family.  In this post, I’ll try to lay out the canning process that we use.  It has a lot of parts, but each part is simple, so if you have exacting standards, patience and time, anyone can do this. As my mother would tell you, described below is the “Open Kettle Method.”  I’m sure there are a number of different ways to skin a tomato, so to speak, but this is the time-honored method of the Calvano family.  We try to gather together as many of us as possible to share in this labor of love, and at this point, we are three generations strong, plus a few sister-friends to add depth to our bench!  In these photos, you’ll see my mom, my sisters, and my sister-friends.  I am so proud to be sharing it, them, this, with you.  Please enjoy every minute of your Tomato Day.

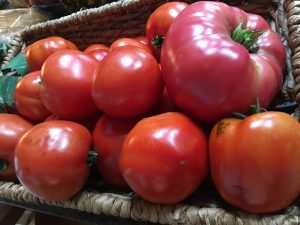
Step One:  Gather your tomatoes.  

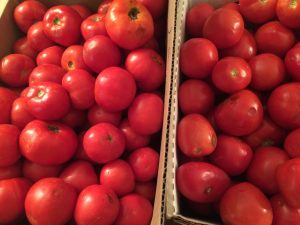
We like to can at least 100 lbs at a time…but you can use any amount– the steps remain the same!  You can harvest them from your own garden (my sister, Susanne’s home-grown are pictured on the right), or pick them up at a farm, farmer’s market, or arrange a deal with the produce manager at your local grocery store (that’s what my mom did this year).  You can usually get crates/bushels of tomatoes for about $1.00/lb, in 25 lb crates.  You can use any kind of tomato, really, but the larger, more meaty varieties are the easiest to peel and can, and yield the richest sauce (the more pulp and seeds a tomato has, the more watery it will be, and that makes a thin sauce).  I love oxhearts and heirlooms.
  

Step Two: Set Up!

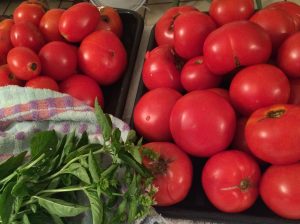
Set up is the key to success here.  This is what you need:  fresh basil, one-quart glass jars (Ball or Mason), lids, rings, table salt, kitchen tongs, canning funnel, slotted spoon or strainer, 1 teaspoon measure, pot holders, large pots and pans and bowls, and counter/table space.  

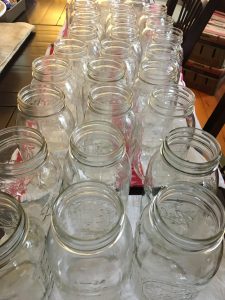
Set up your jars.  The jars need to be sterilized.  Either dip them in boiling water, or run them through the dishwasher.  Be careful not to touch the rims once they are sterilized, so that you can get a perfectly clean seal when it’s time.  Line up your jars on a table or counter.


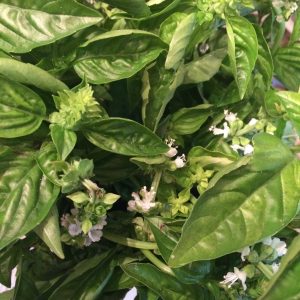
Set up your basil.  Wash your basil and allow to air dry.  The basil needs to be plucked from stems and set aside in a large bowl.  You will need one-two basil leafs per jar of tomatoes.
  

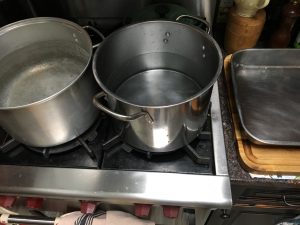
Set up your tomato-dipping station.  You will need a large pot for boiling-hot water, a large pot for cold water, and a large pan for tomatoes that are ready to be peeled. See below.
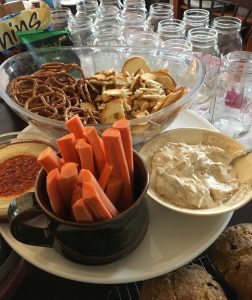
Set up your snack station.  As far as set up goes, don’t forget to feed your workers!  No matter what quantity you’re canning, it’s a long process, which may span several hours and a few meals.  If you’re doing 100+ pounds, you’re going to need a team, and you don’t want your team to be hungry!  Make sure you put out a nice spread to keep your workers happy.  This year, my mom made two quiche, I made blueberry muffins, and we had an assortment of chips/veggies/dip/hummus.  It did the trick.


Set up your tomato-peeling station.  On your kitchen table or counter, lay down some old bath towels, and get out your biggest bowls and pans.  Assemble sharp paring knives.  Now you’re ready!

Step Three:  Dip Tomatoes.

Submerge your tomatoes into your big pot of steaming-hot water for two-three minutes, until the skins crack. Retrieve your tomatoes, using a slotted spoon or strainer, one by one, and submerge immediately into your (adjacent) pot of cold water.  Move from cold water into large pans, and carry to your peeling station.  It helps to have several people working the tomatoes through these stations.  As you can see, the tomatoes can really stack up if you don’t have more than one person peeling! 
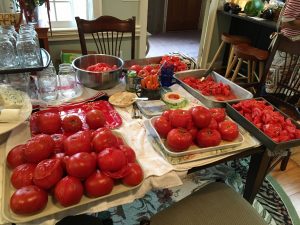
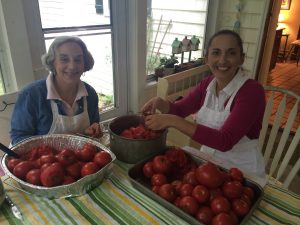
Being able to dedicate one or more people to peeling and one or more people to dipping is a huge luxury and a big part of the joy of Calvano Tomato Day.  Here are my mom, my sister, Susanne, and my Elizabeth.  I don’t know how my other sister, Maria, always avoids photos on Tomato Day, but she’s in there, behind the lens.

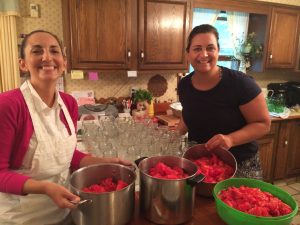
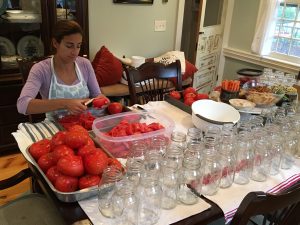
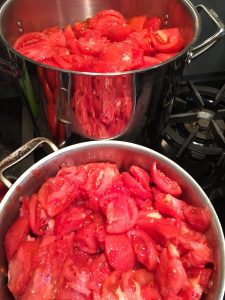
Here’s a nice big pan of dipped tomatoes that are ready to be peeled, and here’s me, manning the peeling station.  And two giant pots of quartered tomatoes, ready to be cooked.
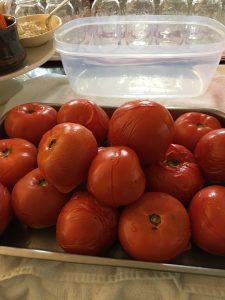
Step Four:  Peel and quarter tomatoes.  

Grab your sisters, your sharp paring knives and your dish towels and get to work on peeling, coring and quartering your tomatoes.  A few tips: when in doubt, throw it out.  You can not afford to allow one spoiled tomato to ruin an entire batch.  If it’s too soft, smells a little funny, or could be spoiled, throw it away quickly and without allowing the juices to mingle with the good tomatoes you’ve already peeled and quartered.  Pile up your skins and cores and pared bits– you will bury them in the ground to return their nutrients back to the earth (or compost) when you’re done.

Step Five:  Cook tomatoes down.

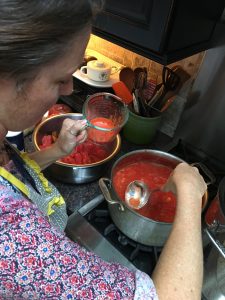
Cook your quartered tomatoes down on the stovetop, stirring frequently.  Bring to a boil and cook at a boil for 30 minutes.
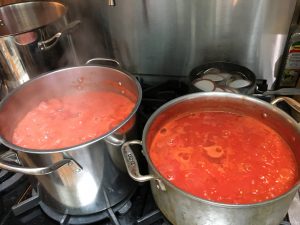
Pro Tip: on the back burner, bring your lids and rings to a boil in a saucepan full of water.  You can do this in batches; we do ten – twelve at a time.  This will heat and sterilize them.  Get your kitchen tongs and potholders ready.

Now you’re ready to start canning!

Pro tip:  While your tomatoes are cooking, move sterilized jars into an empty oven, set at 200 degrees, to make sure the jars will be the same temperature as the boiling hot tomatoes (to prevent cracking/bursting).  As you fill jars, keep replacing cold jars into the warm oven so that you always have warm jars to fill.


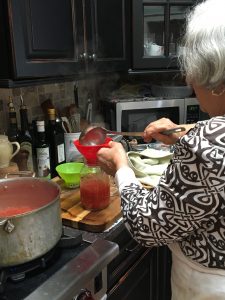
Pro tip: Skim the scum.  Take a few minutes, before ladling the tomatoes into jars, to skim the bright red, frothy acidic “scum” off the top of the boiling brew… getting rid of this murky froth will yield nice clear quarts of finished product.  Dump the scum down the drain.  Here, my mom demonstrates this essential step.  Isn’t she the most.  On the right is my friend, Lynsey, an accomplished scum-skimmer in her own right.
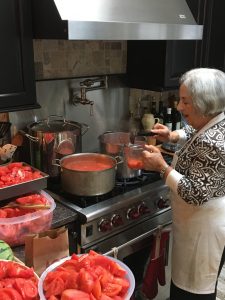
     

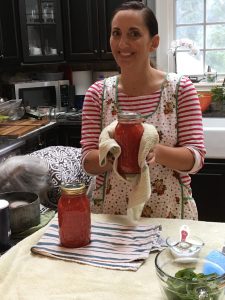
Step Six: Fill your jars.  Ladle cooked tomatoes into each jar, using the canning funnel.
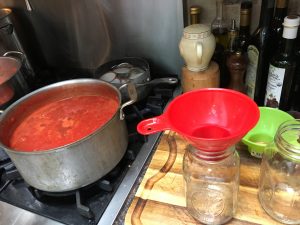
 

Add (one teaspoon of) salt and (one-two leaves of fresh basil to each jar, then carefully place lid and screw on ring, loosely, using potholders and tongs, of course!
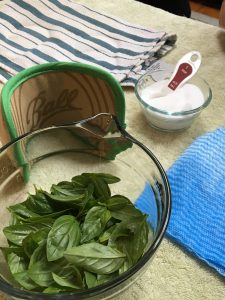
   

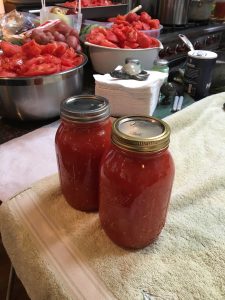
Set filled jars aside, 1/4 inch apart from each other, covered by a blanket or towel, and allow them to cool slowly.  As they slowly cool, suction will be created and the seal on the lids will be activated.  You’ll hear this as distinctive, satisfying “pop” sounds on your countertop all night long!
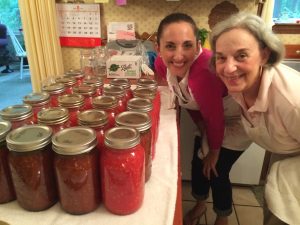
                     

You’ve done it:  you canned all of those gorgeous tomatoes, Calvano style.  The fruit of the gods.  The life force.  Let those jars cool, make sure they are “popped,” or sealed, and you’re stocked.  Pro tip: if any of your jars don’t seal, you can re-boil and re-can them!  Or just make a pot of sauce with them right now and call it a day.  Now, if you want to make sauce (of course you want to make sauce), just click right here, and away we go!  Mangia!


This is the End…of Summer!

  This is what my face looks like at the end of summer.

August is a lot of things.  Easy is not one of them.

For my family, this has been a summer of setting, facing and meeting goals.  My personal goal was to make sure every one of us got what each of us needed to be our best selves this summer, and a lot of that had to do with keeping a well-stocked fridge for hundreds of breakfasts, lunches, snacks and dinners on-the-go and after-hours.  For my husband and me, that meant facilitating daily communication and logistics strategies for two busy teenagers sharing a car, coaching and navigating challenges related to time management, fitness management, sleep management, priority-setting and social development, and figuring out where a healthy marriage, and all that goes into it, fits in…

We’ve met our goals, we feel accomplished, and we are utterly exhausted.  For me, the end of summer brings relief: we’ll go from being a household of three people doing unpredictable shift-based work (me being the only one on a regular daily schedule), back to only one of us on the wild work hours and the rest of us with boring, predictable schedules (thank heavens).  Management of the household will be less chaotic, will require less daily problem-solving and thinking on our feet, and will become more routine…and there ain’t nothing I like more than a good, solid, stable old routine.

The end of summer also brings the start of Fall, which is every cook’s season of bliss.  Bring on the chili! The red sauce!  The bolognese!  The handmade pasta!  The SOUP!  The bread!  The cookies!  The cakes!  Fall is the Harvest, the Cooking Season, and the reason we all bring our knives to be sharpened at the Farmers’ Market in the summer.  And I have a few new cookbooks and a few hundred new recipes to try!   I am excited.  So, the End of Summer really requires its own celebration, and that’s exactly what we did, with friends and family, last night.
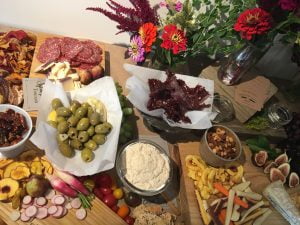
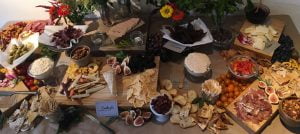
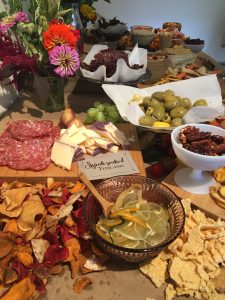
I hired a wonderful company called Brown Paper Bounty to put together a decadent “food pile,” pictured here, for our friends and neighbors to enjoy while we toasted the End of Summer 2017.    

It was delicious in every way.  And friends, guess what I discovered: it’s ok to know your limits and your capacity and sometimes call in reinforcements instead of cancel when Life doesn’t allow you to do every single thing you want to do…  like make your own crackers, jerky, seasoned nuts, dried fruits, dips, spreads and jams (which these guys do)!

I recommend these Life Savers when you need a hand with gorgeous, decadent, house-made piles of food (they also bring cheeses, cured meats and fresh fruits, veggies and flowers and do all of the set up and take down for you) for your treasured friends and family to enjoy, at the End of Summer or any time!


Here’s to a delicious Fall, everybody!  Start your ovens and let the cooking begin!


Grilling & Chowdering Our Way Through July

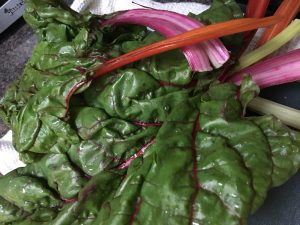
This is how we do it:  every week, my parents deliver our half of the farm share that we share… For the past few weeks, it has included (fresh, local, organic) kale, rainbow chard, baby bok choi, spring onions, arugula, basil, spinach or other greens, cabbage, plenty of fun zucchini and other squash, carrots, garlic scapes, and so much more.   It’s marvelous.  It’s like the produce aisle harvests itself and walks right into my kitchen.  So that’s my first “grocery fill up” of the week, and it’s always on Friday evening (perfect).  Then, I sit here on Saturday morning and figure out how to bring these fresh ingredients together into great meals that we can eat all week.

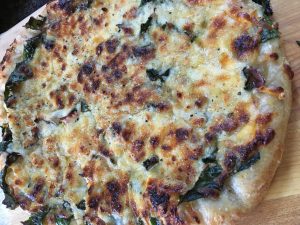
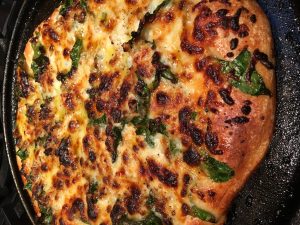
I have been making 2 – 4 grilled pizzas every week.  Here’s how: I use store bought pizza dough, topped with 4 – 6 cloves of minced garlic, a drizzle of olive oil, a heap of chopped rainbow chard, piled high with shredded mozzarella, sprinkled liberally with salt, pepper and garlic powder, and grill (in a cast iron pizza grill pan– I have two, so can make two at once) at about 500 degrees until the crust is golden, and the cheese is bubbly/crispy.  MMMM we love the swiss chard pizza.


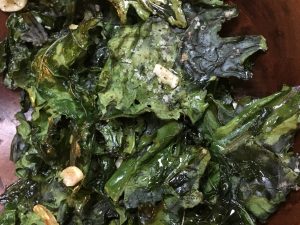
We gobble it down for Friday night dinner (the trick is to have pizza dough in your fridge already– so buy extra when you are at the grocery– or make your own).  And then we eat it for a quick, easy lunch all week.  I’m going to be sad when rainbow chard stops showing up in my farm share.  If it’s not too hot, I will also turn on the oven and make kale chips.  It’s a good way to live: hot swiss chard pizza and garlicky kale chips on a Friday night.  MMM!!!

I will also grill two proteins… maybe a big  pack of chicken (marinated, of course) and pork chops.  That was last week.  Just throw them in marinades the minute you get home from the grocery, and then grill them whenever you want (a day or two later).  You can use one of my marinades, make your own, look up a different recipe, or use something from a bottle.  Or use a spice rub!  I keep a big container of the spice rub for my sweet potato fries on hand– it’s great on any protein, too, especially pork!  Either way, your family will LOVE the flavor and having something hot off the grill, mid week, and you will love the fact that there is virtually NO prep time needed, day-of.  Toss any veggie (including corn) in avocado or olive oil, sprinkle with salt and pepper, and grill alongside your protein.  Dinner is done!


If you get a rainy/cool day, and you have time to bake, try these banana-chocolate chip (baked) donuts.  They are sweetened with those mushy bananas on your counter and greek yogurt and double as breakfast-on-the-go.  Or whip up a batch of savory corn muffins.  I put jalapeños and grated cheddar in these… my recipe calls for bacon and green onions.  Add whatever you like.  These also serves as a meal on the go– a satisfying lunch, breakfast or snack.


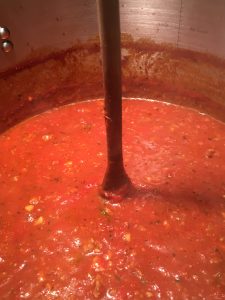
And, of course, where would we be without PASTA and RED SAUCE.  I made 12 quarts of meat sauce last week, and it’s already gone.  Axel literally drinks it from a mug or spoons it out of a bowl for breakfast, lunch and dinner.  (This fascinates me, but I can’t say I blame him!)  A few weeks ago, I had bought some littlenecks, thinking I would grill them for the 4th but didn’t get around to it, so I made linguine with clams instead… and was reminded of the HEAVEN ON EARTH that is linguine with clams. It’s literally just melting butter (about a stick) in a large pan with about 4 – 5 cloves of minced garlic and about 4 Tbs olive oil, add the juice of  2 lemons and about a cup of white wine… simmer.  Steam your clams separately.  Boil your pasta until al dente, then add strained pasta to the sauce you’ve created… add steamed clams, let the pasta soak up the juice, add chopped parsley, salt and pepper to taste, and be transported straight to heaven.


Last, but not least, was our special creation of the week: Corn Chowder.     The fresh corn in this chowder makes it a knock out.

The bacon doesn’t hurt, either.  You could call it “Bacon Soup,” if that helps you sell it at home.  I made 9.5 quarts on Tuesday night, and it was gone by Friday.  Your kids will love this.  You will love this.  It’s crazy inexpensive and easy to make.  You need to try this one.  It was actually worth sweating over the stove in 90 degrees with no AC.  That’s how delish.  Enjoy, and have a delicious week!


Boston Baked Beans

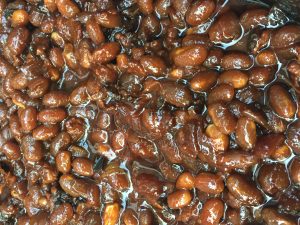
Remember these?  While I was in law school in Boston, I worked at “Cheers,” otherwise known as “The Bull & Finch Pub.”  I was a server, i.e., a chowder and beans scooper, a burger and beer slinger, an “aggressively friendly” ombudsman for the City of Boston and the immense summer tourist population.   Before then, I wasn’t a big beans fan.  But my roommate, Melissa, and her boyfriend, Matt, would come to Cheers so often, and rave so intently about the beans, that I was convinced to try them… Well, then I understood.  Once you taste these beans, your life changes, and you become a fanatic.  See for yourselves!

Oh, and they are simple and inexpensive to make and they keep for days… And they are pretty gosh darn nutritious:  navy beans are high in cholesterol-lowering fiber. When combined with whole grains (like brown rice), navy beans become a (fat-free) high quality protein!   Navy beans are high in folate, manganese and vitamin B1 as well as phosphorus, copper, magnesium and iron.  But all your kids will know about them is that they are sweet and bacon-y and they want more, please!

Matt & Melissa, if you’re reading this, and you try this recipe, let me know if these bring you back in time to Charles Street and Nino’s Pizza.  Cheers to you!


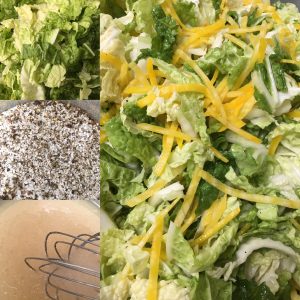
Napa Cabbage Slaw

This is as simple, fresh and delicious as summer itself.

Slice a Napa cabbage into thin strips (in half longways, first, then wash it thoroughly, then shake out the water, then slice, slice slice).  Shred (on a mandoline) or grate a large golden beet into thin strips (after peeling with potato peeler).  Mix 1/2 cup apple cider vinegar, 1/2 cup salad oil (avocado, canola or corn oil), a big pinch of Hog Island Spice Rub (that’s right: salt and pepper), and whisk…

Pour onto the slaw, toss and enjoy!  This fresh, crunchy, tangy slaw goes well into sandwiches (my brother in law put in on top of an Italian sausage sandwich last weekend, and it would be perfect on pork sliders), on the side, or under protein (fish, beef, pork, chicken, you name it).  And it probably costs about $5 to make 15 servings.  How can you not make this today?


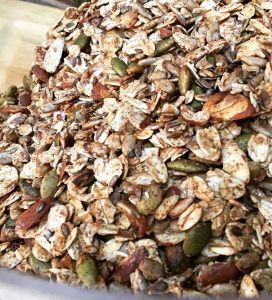
Granola: Budget-Friendly, Super Healthy Snacking Solved

Guys, don’t forget to make a six month supply of granola while your coffee is brewing.  PLEASE stop buying 10-12 ounce boxes/bags of granola for $5 – $7 a piece at the grocery.  Not only will that bankrupt your checking account, but it can be nutritionally bankrupt, too (full of added sugar and chemicals).  You can make 12 cups of granola (that’s 96 ounces!!) for less than $12, and it will last weeks-months.  Add only the ingredients you want in your (and your family’s) body(ies), and you can just follow this recipe if you don’t feel like being creative. By all means, if you feel like jazzing it up, add chia, different kinds of nuts, coconut flakes, protein powder, chocolate chips (just don’t bake them in the oven) and/or whatever else you like!   It’s delicious, it’s SO EASY, and it’s nice and easy on your bank account.  What more could you want, besides some fresh fruit and yogurt to go with…  Enjoy!


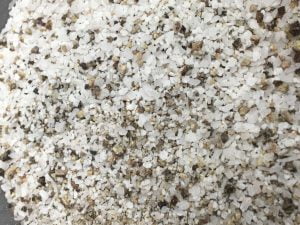
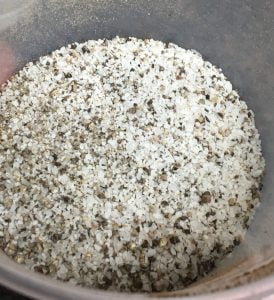
Hog Island Spice Rub (wink)

Is anyone looking at this and saying: “it’s just salt and pepper!?”  You’d be 100% correct.  It is just salt and pepper.  But I swear to you, here on my blog for “everyone” to see: this counts as a huge time-saving and meal-delicious-ing tip.

Reason #1 To Make Hog Island Spice Rub:

I don’t think I can convince you with words, the way that your next burger can convince you with taste, so just humor me, and do this:  Throw a half cup of kosher salt into a tupperware and grind your peppermill (yes, it absolutely HAS to be freshly ground pepper and not the powder they sell already-ground) into it until your arm hurts, and mix.

Prep your burgers by grabbing a handful (about a 1/4 pound) of 85% or 86% lean ground beef, and form a patty.  (Try not to overwork the meat.  Just gently shape it into a patty.  Bobby Flay taught me to press my thumb into the center so that it will stay patty-shaped and not rise back into a ball once it’s on the grill.  It works.)  Then sprinkle a few pinches of Hog Island Spice Rub onto your patties and grill.  Most delicious burger EVER, right?  I know.

This is actually how the old “Hog Island Spice Rub” mixture earned its name…  Every summer, we pack up the cooler and sail to Hog Island, a tiny, privately owned, beautiful island off the coast of Bristol, RI, to visit our dear friends.  It’s one of the happiest times of the year for us.

This is what my face looks like on Hog.

See how happy?  Because: family, friends, food, beer, sailing, sun, outdoor showers, sleeping on a boat, corn hole, digging quahogs with your toes and eating them on pizza for lunch.  Life on Hog is simple, delicious, and perfect.

Our boat is small (we can only carry so much) and our time on the island is precious, so we employ as many space-saving and work-reducing strategies as possible.  I like to prep as much as I can before we pack and leave, so there is little work to do once we arrive.  I form the patties at home, separate the layers with wax paper, and pack them into the cooler on ice.  We all know that putting salt on anything will draw out its water content, and you don’t want to put salt/pepper on your hamburger meat and then set out for a five hour sail.  So, we have to season after we get there, just before the burgers go on the grill.  Instead of packing the peppermill and the salt, I just put together a little container of salt & ground pepper and throw it into the cooler.  The first time we made burgers on Hog, our friends bit into their burgers and immediately exclaimed, “What was in that seasoning you put on these burgers– they are FANTASTIC–best burgers EVER!”  Laughing, I explained that it was a rare and special seasoning blend that I created just for them, and we now call it, “Hog Island Spice Rub.”

But you know what?  It’s a great reminder that you don’t need anything fancy or expensive to create the cleanest, most flavorful, most delicious and memorable flavor in your food!  Sure, we still use other spices to add interest and variety (brown sugar, cayenne, paprika, mustard, cinnamon, garlic, herbs, etc., etc., etc.), but if you want to taste your food (meat and veggies) at the peak of its natural flavor profile, you can not beat the simplicity and ease of good old kosher salt and freshly ground black pepper.

Reason #2 To Make Hog Island Spice Rub:

Once Hog Island Spice Rub was created, it became a staple on my kitchen counter.  I realized that my prep work, designed to reduce work on boat-based Hog Island, would also work in my land-based kitchen. I had taken what used to be a two step process (throw on a sprinkle of salt, and then reach for the peppermill and grind, grind, grind) into a one-stepper!  Pinch and toss!  It actually saves so much time!  Every single time I prep food to go on the grill (which is almost every single day), it’s drizzle of oil, sprinkle of Hog, go!  Every time I pack a lunch, serve a salad, make a dressing or marinade, make sauce or ANYTHING that calls for salt and pepper, I just pinch, toss, go!, instead of pinch and toss and reach and grind and grind and grind.  Also, it’s portable, so you can pop it into your cooler, your lunch bag, or your picnic basket.  It’s not earth-shattering, but whenever you can reduce two or three steps into one, you are winning, in my book.

Give it a try and let me know what you think!